

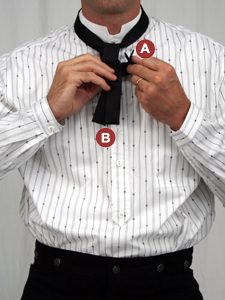
Step 1
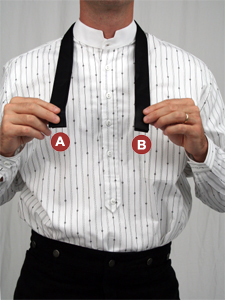
Hang the tie across the back of the neck, with equal length ends. We’ve labeled the ends A and B for clarity.
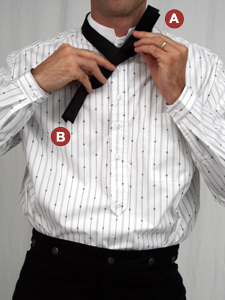
Step 2

Cross the one side over the other. In this instance, A crosses in front of B.
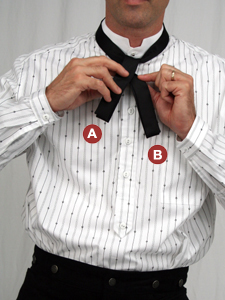
Step 3
Tie a simple knot, tucking A behind the neck loop. Be sure this is a reasonably snug knot, as its location will determine where the final knot lies.
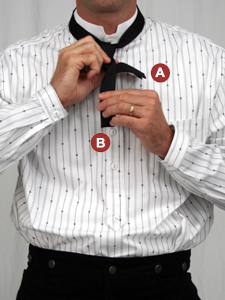
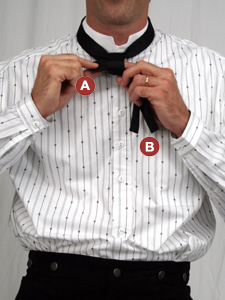
Step 4
Cross A back over B, pulling B to the other side. The portion of A that’s at the center will be the visible portion of the final knot.
Step 5
Hold B straight down, and pull A back behind B.
Step 6
Take the end of A and feed it back through the loop created in steps 4 and 5. You may need to switch hands.
Step 7
Pull the end of A carefully through the knot.
Step 8
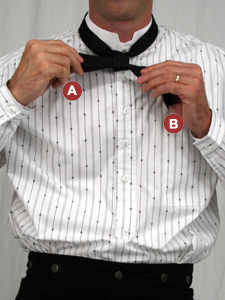
You’re almost done! Carefully pull A and B to get the ends to roughly the same length. You may want to smooth out the front of the knot before pulling it tight.
Step 9

Snug up the knot to your liking. Practice until you can consistently achieve the style of knot you like.